Where Can I Add My Own Art to My Things
How to frame your ain art
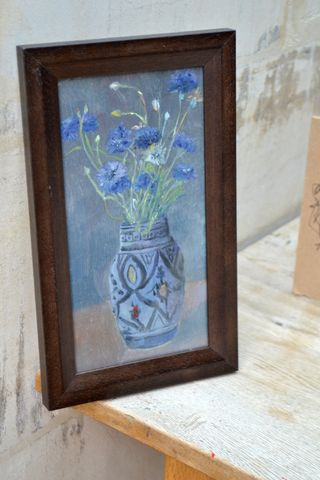
Learning how to frame your own art could relieve you coin as getting your art professionally framed tin be expensive. Ready-made frames are a cheaper culling, just they're but suitable if your work is a standard size such as A4 or A3. If y'all desire a cost-effective solution, with the flexibility to accommodate unique-sized fine art, then you can make your own frames. It's non equally hard equally it sounds.
In this guide, Rodney Dive will explain how to frame your art at dwelling house, without using the expensive automated equipment yous run into in a professional person workshop. With a little practice and an eye for detail, there's no reason why your frames can't be every bit good equally the ones your local framing shop makes.
In need of new equipment? Go yourself the best pencils with our handy guide, and so scan the best easels, too.
How to frame your ain fine art
You lot'll initially need to invest in a minimum ready of tools to get started, merely you'll quickly recuperate the cost of those when y'all produce your outset few frames at habitation. You can pick up good quality second-manus equipment from websites such as eBay or Gumtree. When buying tools you get what you lot pay for, since inexpensive tools generally produce inferior results and don't last as long.
The all-time ownership advice I tin offer is to outset making frames with whatever equipment you take to hand (making sure your tools are make clean and your blades are abrupt), and it will presently be apparent what you'll need to purchase. Equally with nigh things, the more you practise it, the more than you will develop your own working methods and practices, and so you can buy tools to suit.
02. Measure up

Make sure you take an expanse to work in that'south clean, flat and big enough to fully support the slice you are working on. Kickoff, measure your fine art. If you're not using a mount board or mat then your frame should match the length and width of the artwork. If you are using a mountain board then the measurements of the mount will of course determine your frame size.
In one case yous have the dimensions, put your artwork out of the way to preclude whatsoever contamination from dust or glue. When working on a especially precious piece of piece of work, I make a bare out of bill of fare, the same size as the art I'one thousand framing, to use for test plumbing equipment in the workshop to avert damaging the original painting.
03. Piece of work information technology out
To piece of work out how much moulding you lot will demand, first summate the perimeter of the whole frame by adding your measured width and height dimensions together, then doubling that number. Next, mensurate the width of the moulding you'll use, multiply this measurement by eight and add together it to your total length, to business relationship for the mitred edges (the 45-caste cuts that will match up to grade the corners of the frame).
Add together on 10 per cent to permit for wastage. Examine your sticks of moulding for knots in the wood or transit damage, then cutting around these so that they don't touch on the final finish of the frame.
04. Mark your lengths
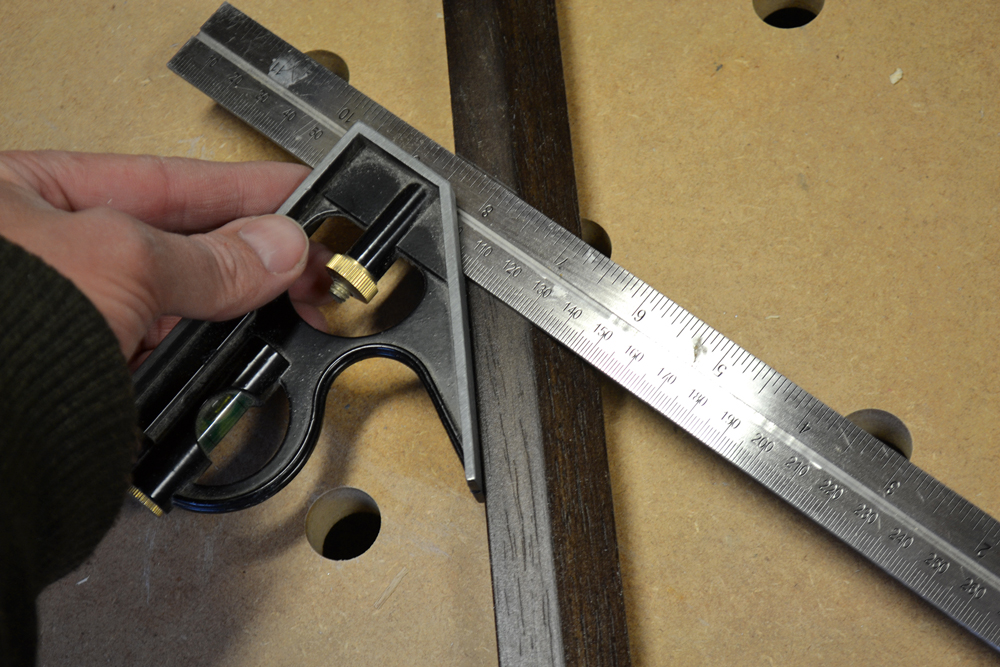
Measure the frame moulding from the within of the rebate (the tab of material that sticks out at the bottom of the moulding. Once the frame is put together, the rebates make the aperture that holds the glass and fine art in place). This needs to accurately match your artwork's dimensions to ensure a snug fit.
Aim to cut slightly larger pieces than required, since information technology's easy to skim off a few millimetres to fine-tune the size, but once something's cutting as well small, nothing can exist done. With this in mind, cutting the longest lengths outset so if you do brand a mistake and then these tin can exist re-cutting to make ane of the smaller sides!
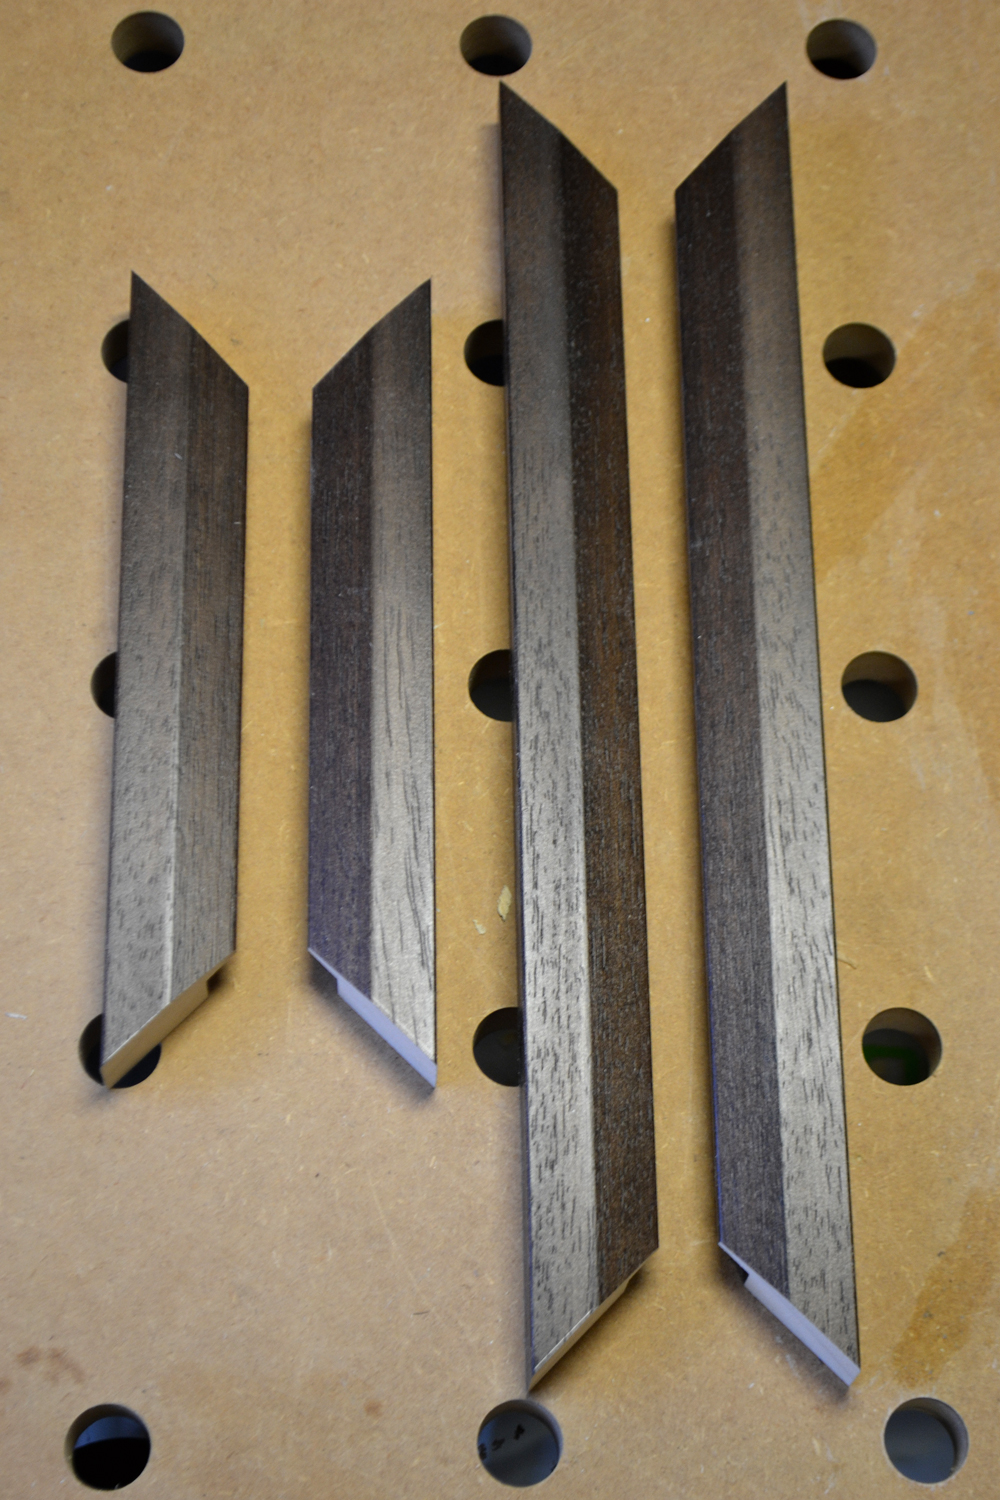
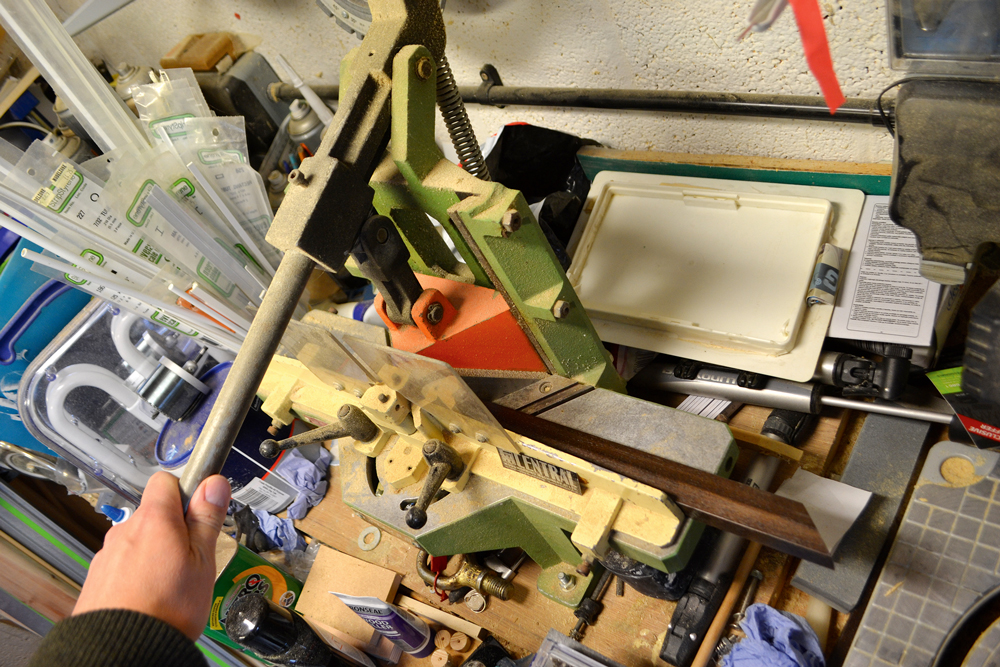
05. Cutting the moulding to size
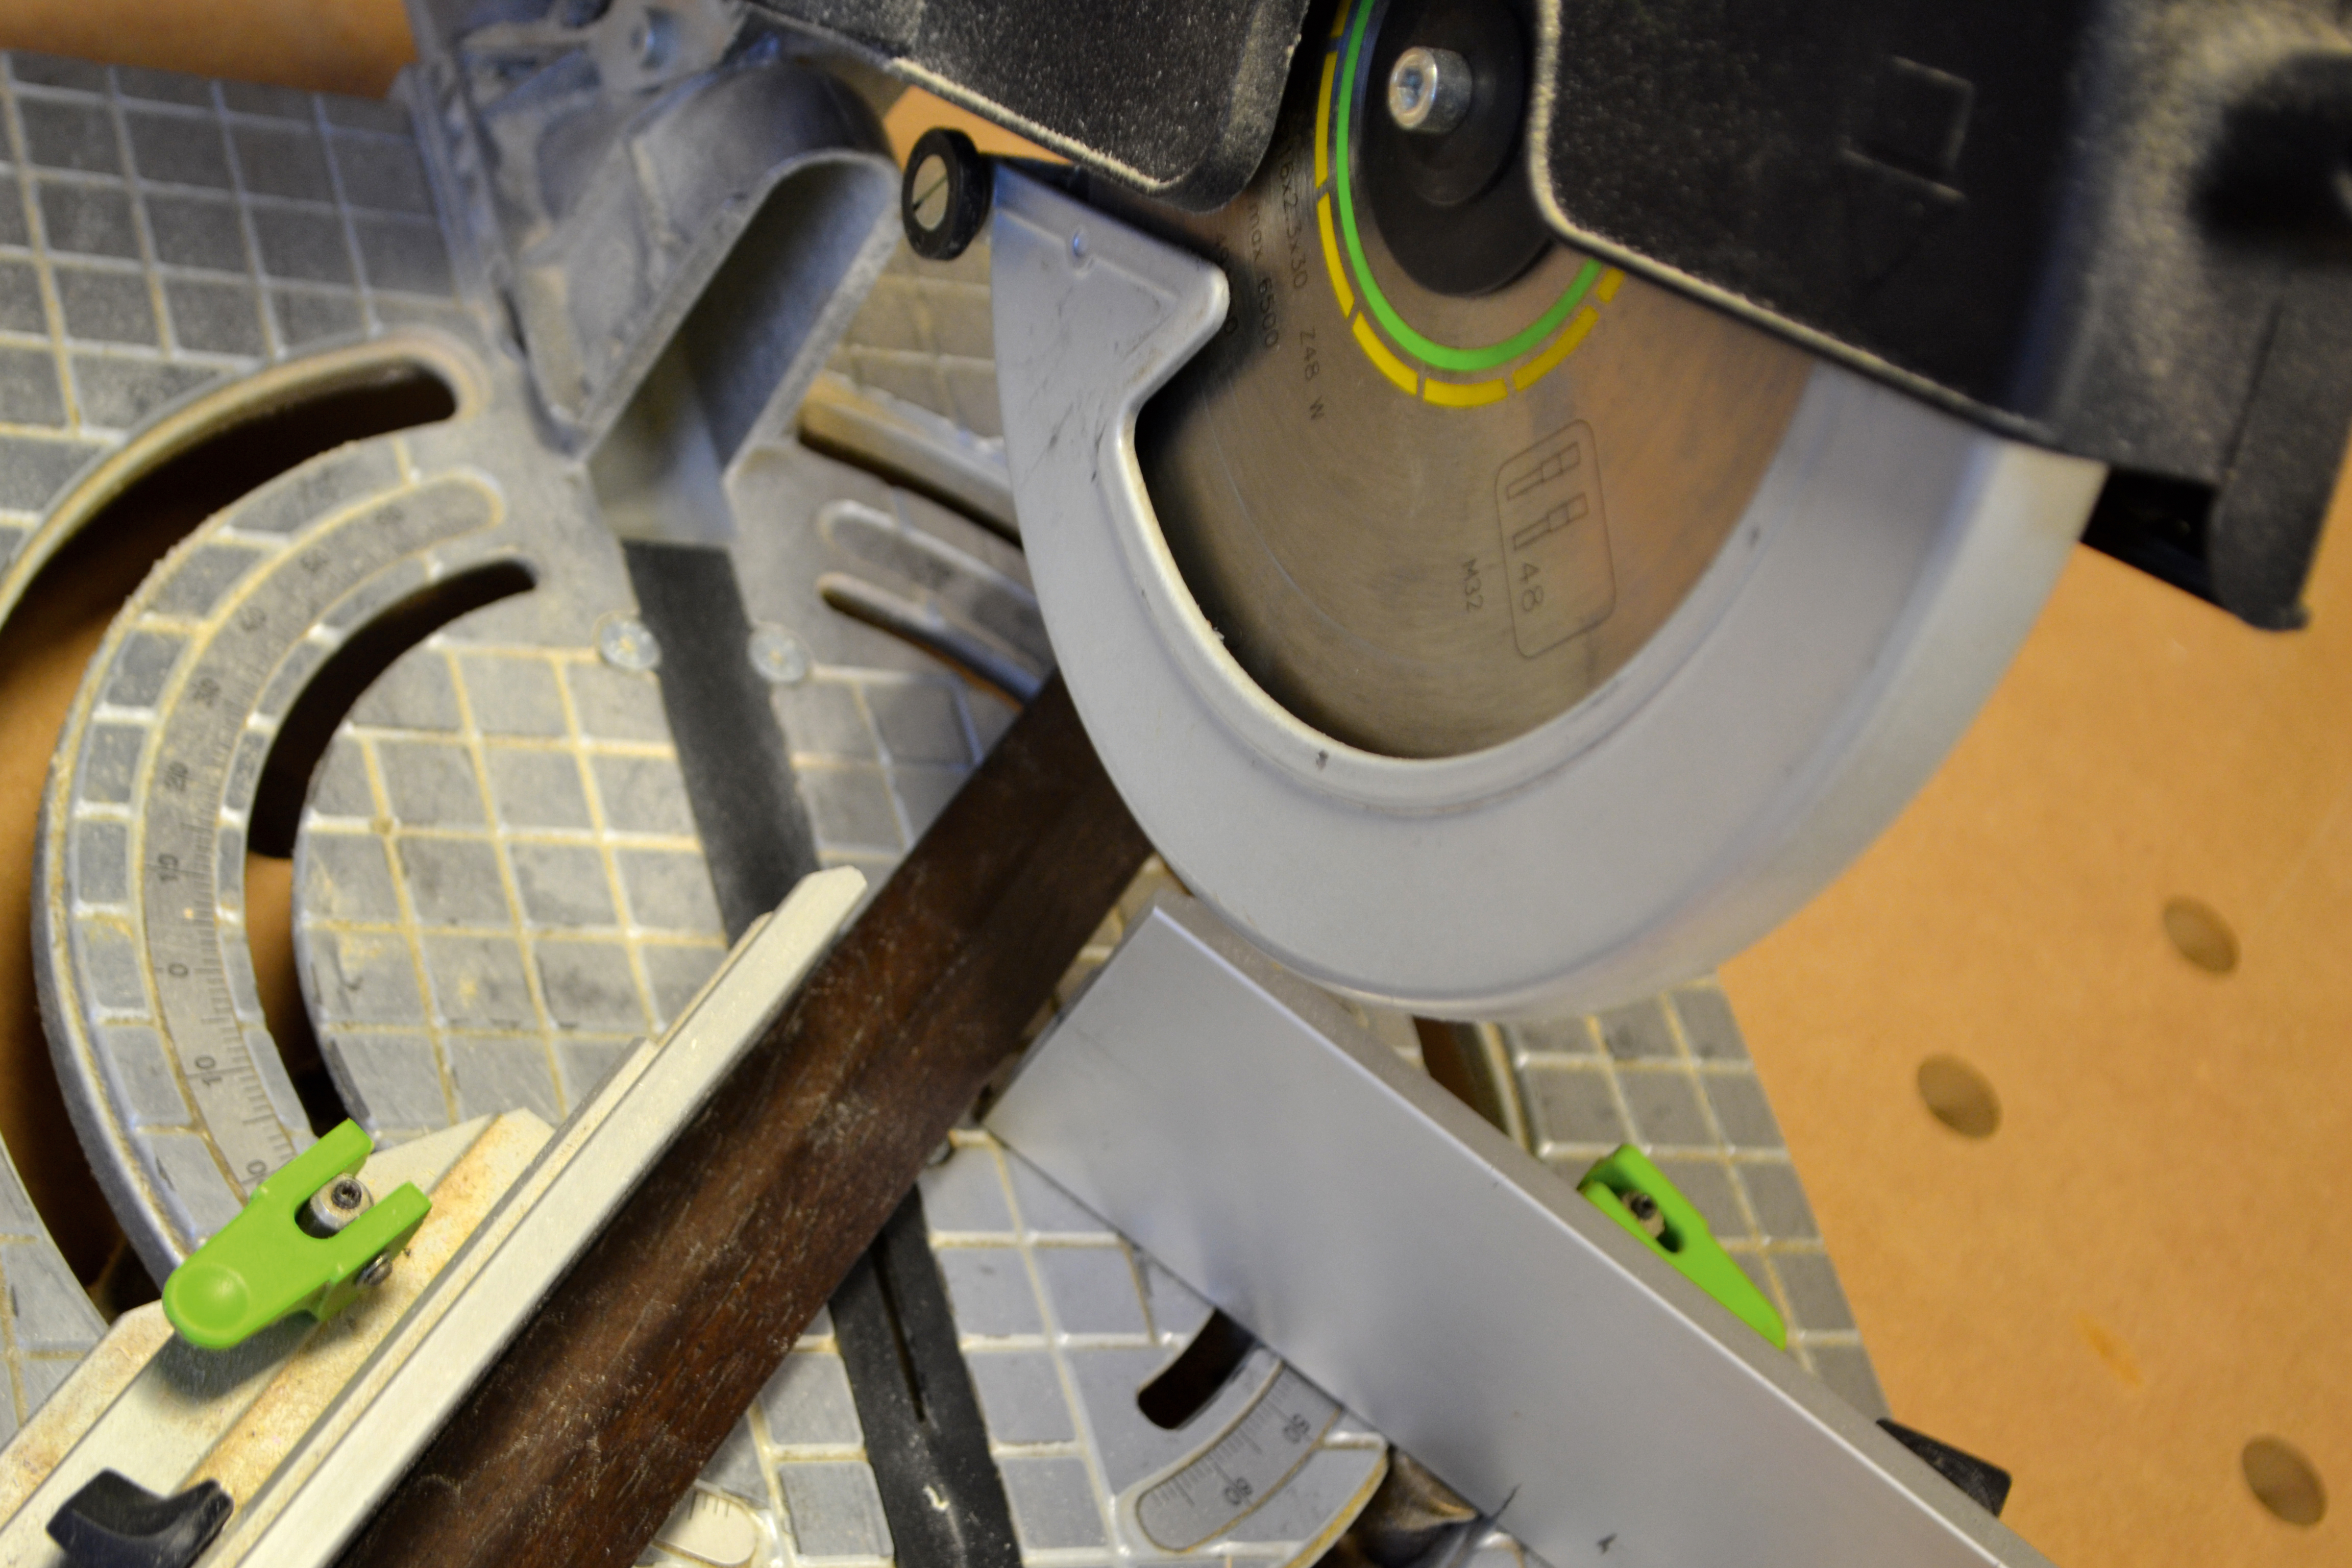
Cut the moulding lengths in two stages. Start, utilize a mitre saw to roughly cutting the lengths. Utilise the finest-toothed saw blade you can get hold of – the effectively the teeth, the cleaner the cut.
Information technology's worth investing some fourth dimension in setting up your saw to make sure information technology cuts true – use some of the spare moulding to do examination cuts to cheque the angle accurateness and to see if the saw blade volition splinter the finish. If this does happen, wrap some sticky tape around the area you're cutting to prevent it from splintering.
06. Prepare for joining
End the moulding cuts with a mitre guillotine, which will hone the edges to be joined to create a flat, polish surface that volition bail well and produce a skillful-looking perfect mitre once joined. Use the guillotine to shave off a millimetre or so from the edge of your rough-cut piece of moulding, then check that all the edges are angled at either 45 degrees or 90 degrees.
Hold your two lengths and two width pieces dorsum-to-back to make certain they're exactly the same size, and then the finished frame volition exist square. Earlier joining them, use a marker to color effectually the top of the cut edges to hide whatsoever slight imperfections in the bring together.
07. Join the lengths
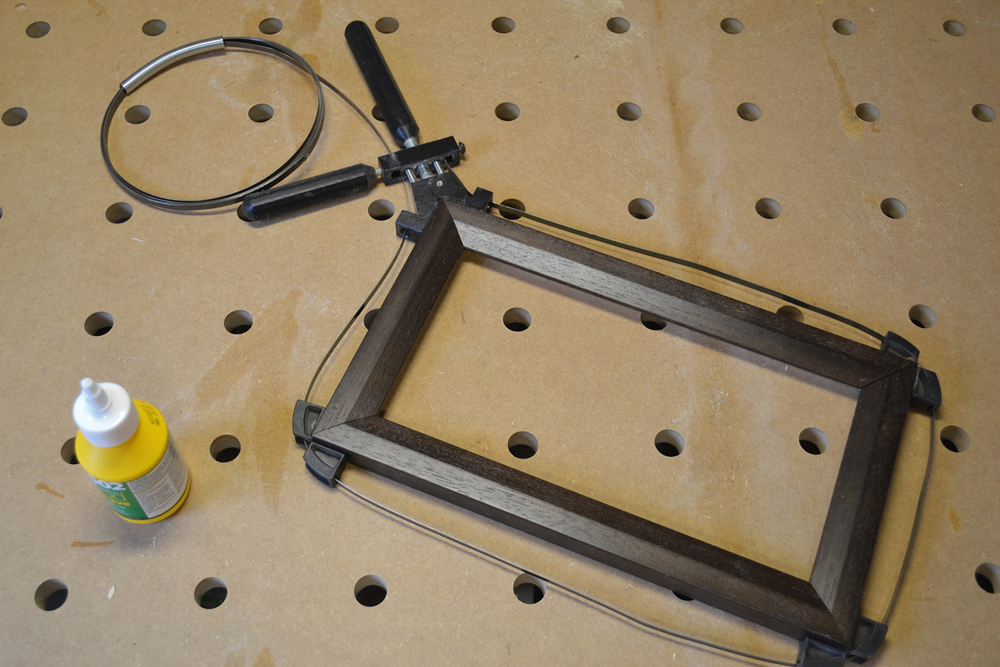
Test-fit the pieces to brand sure they sit flush together, and make slight adjustments if needed. Do this on a clean, level surface to also brand sure the frame is flat. Next, use some PVA wood glue to bond the faces of the mitres together, then run a ring clamp around the perimeter of the frame and tighten it to apply even pressure level around the edges while the glue dries.
08. Underpin
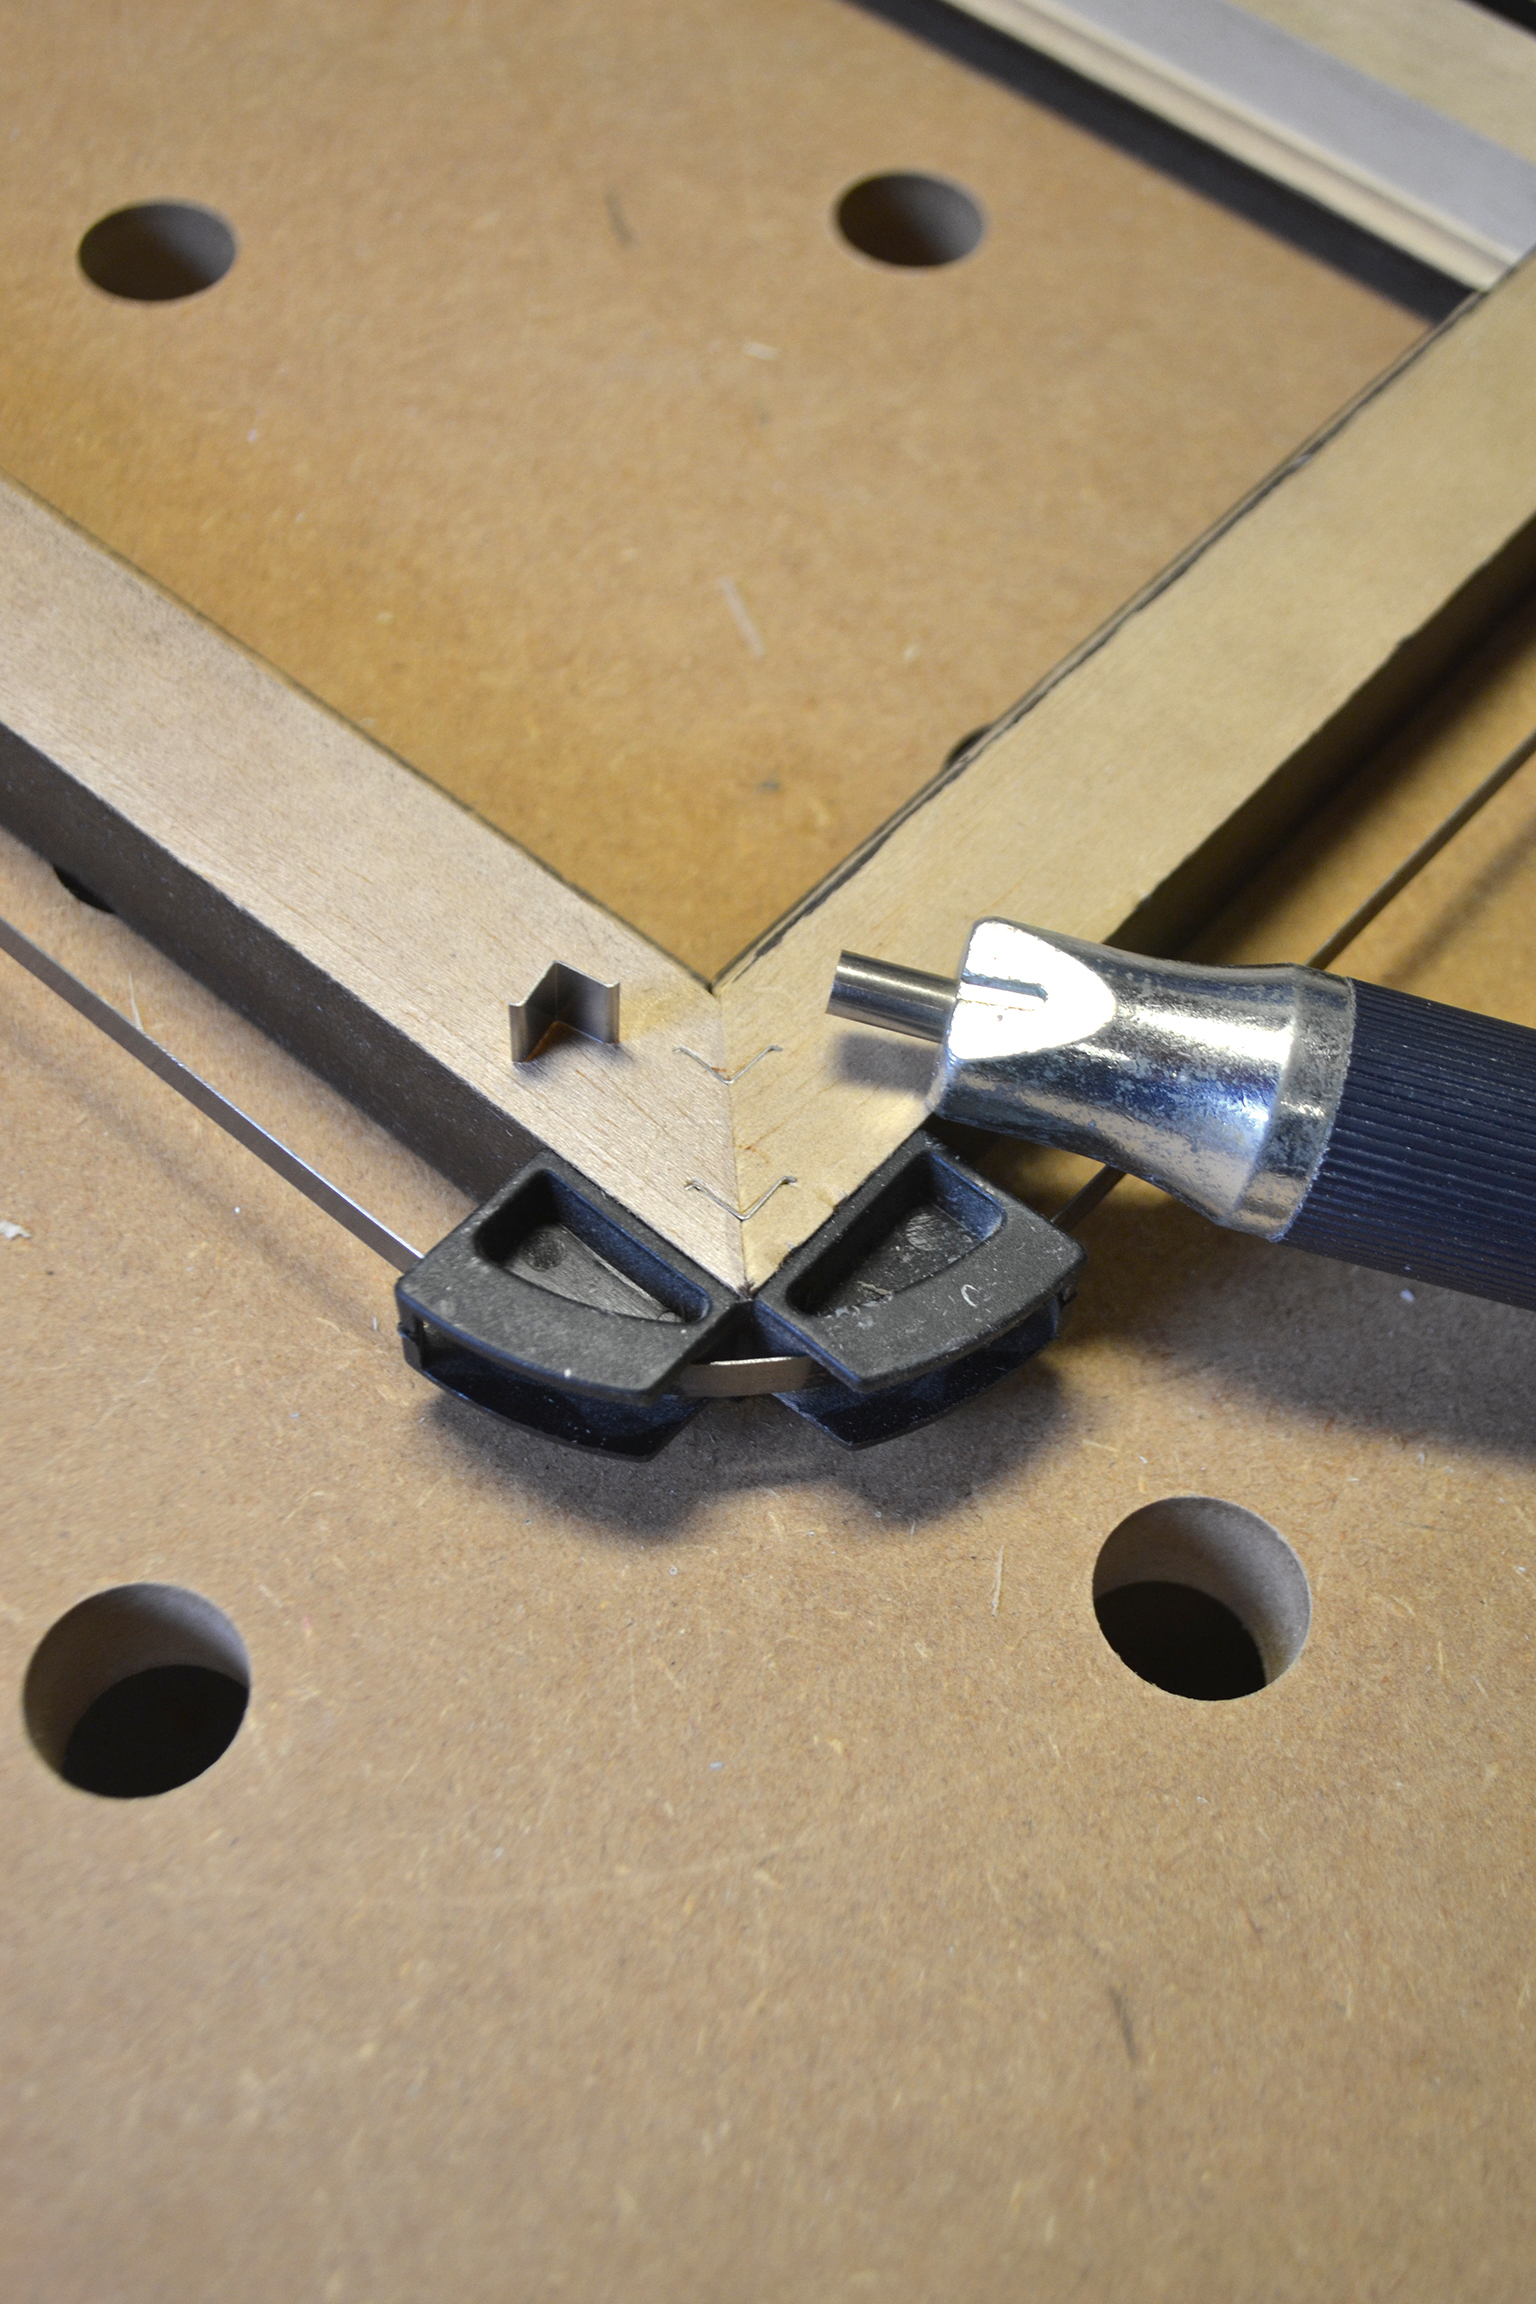
Push button a v-nail into the underside of each corner, using a handheld v-nailer tool. These metallic five-shaped wedges will pull the frame edges together, adding forcefulness and preventing the weight of the frame from deforming it when information technology's hanging on the wall.
Make sure you lot become the v-nail into the wood the correct way around, with the sharper end facing down into the dorsum of the frame corner, with the betoken of the v-shape meeting the angled join. If your moulding is broad then you should put a number of v-nails along the join – hither I've used two v-nails to add together strength.
09. Measure the glass
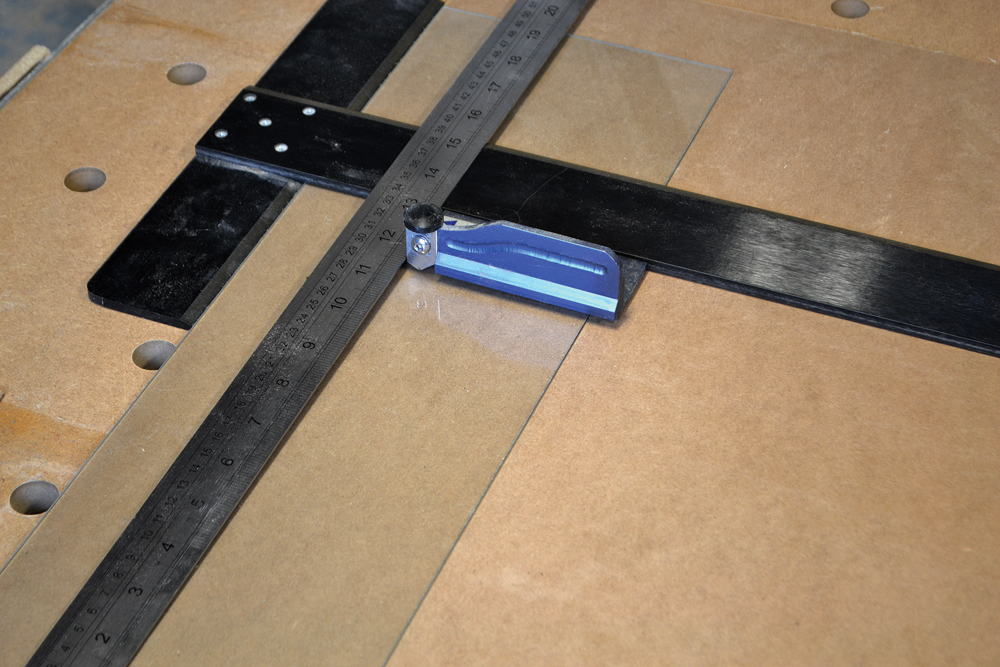
Lay the glass for your frame on a flat, make clean surface that's big enough to support the whole surface of the drinking glass. Use a sharp cutter and a sturdy straight edge that won't slip – a T-square is ideal and will help you lot to brand straight, square cuts.
Measure the glass to fit your artwork by putting the square underneath your ruler and moving the square into the correct position, remembering to let for the width of the cutter itself. Before yous embark cut, make sure that everything is in the right position and that yous take enough room all around you to cut the full length of the glass without any obstructions or distractions.
10. Cut the glass
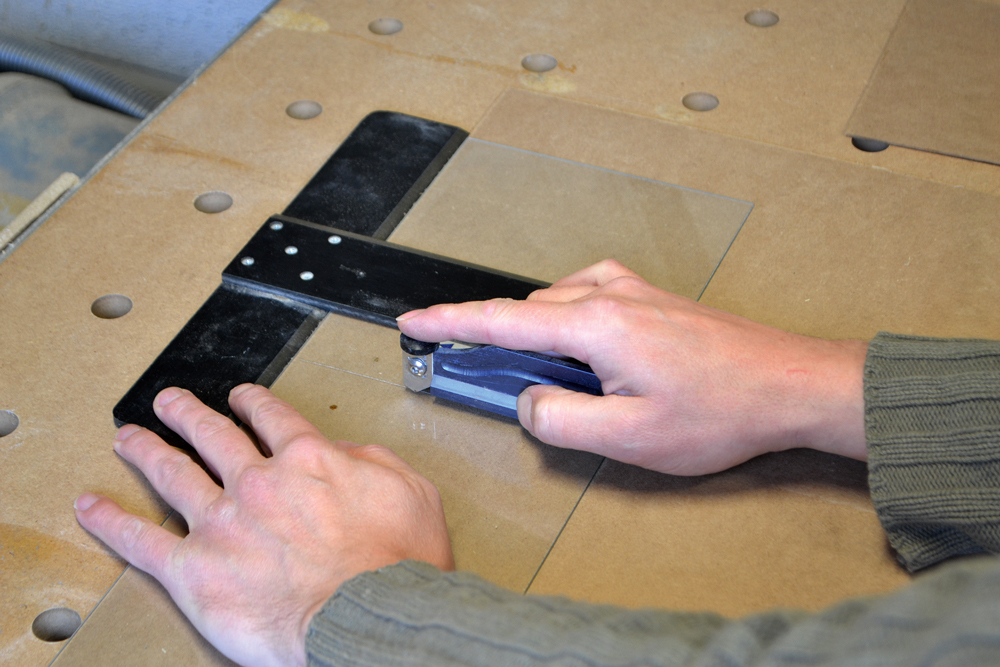
Cutting glass is all well-nigh confidence. Scribe the drinking glass firmly with the cutter along the straight border (if yous use enough pressure it should sound like frying chips). Make certain yous only scribe the surface one time, as this creates a single error line along which the glass will snap cleanly.
Once marked, hold either side of the scribe-line and utilise an even upward pressure until the drinking glass breaks cleanly. Alternatively, place one side of the glass on an elevated surface (the border of the T-square, for example) and utilise a gentle downwards pressure to the other side until it snaps. These newly cut edges are very sharp, so be careful when treatment.
eleven. Cut the backing board
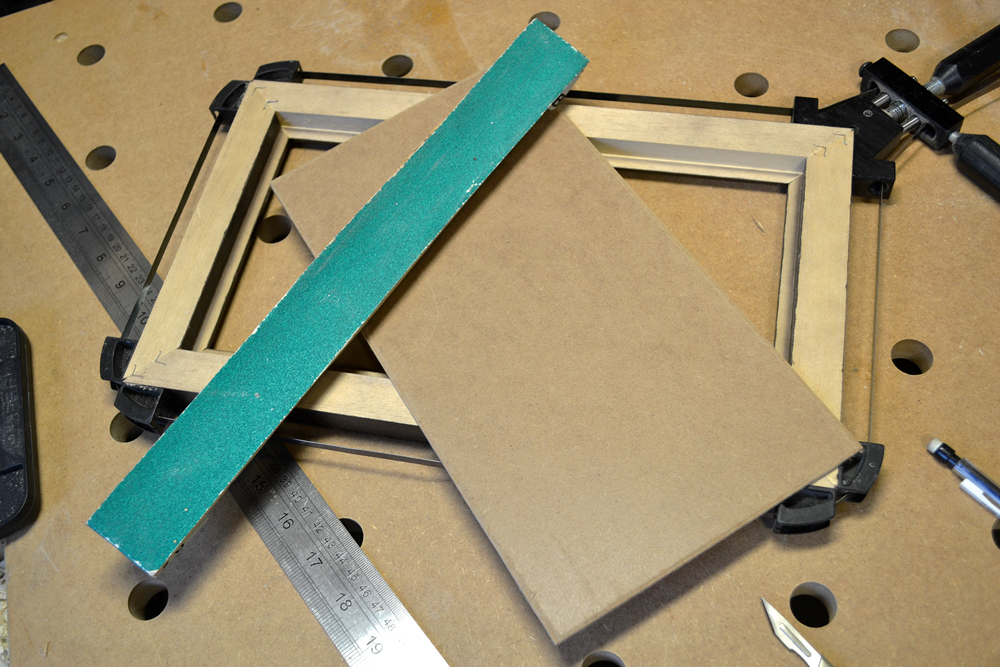
Use 2.5mm MDF or standard hardboard, available from all skilful hardware merchants, for your bankroll board. Measure and mark your backing board with a ruler and square. Employ a sturdy direct border and a craft knife to cut it to shape – you might accept to take several passes through the cloth to cutting right through. One time cutting, sand or plane the edges to prevent splintering.
12. Make it shine
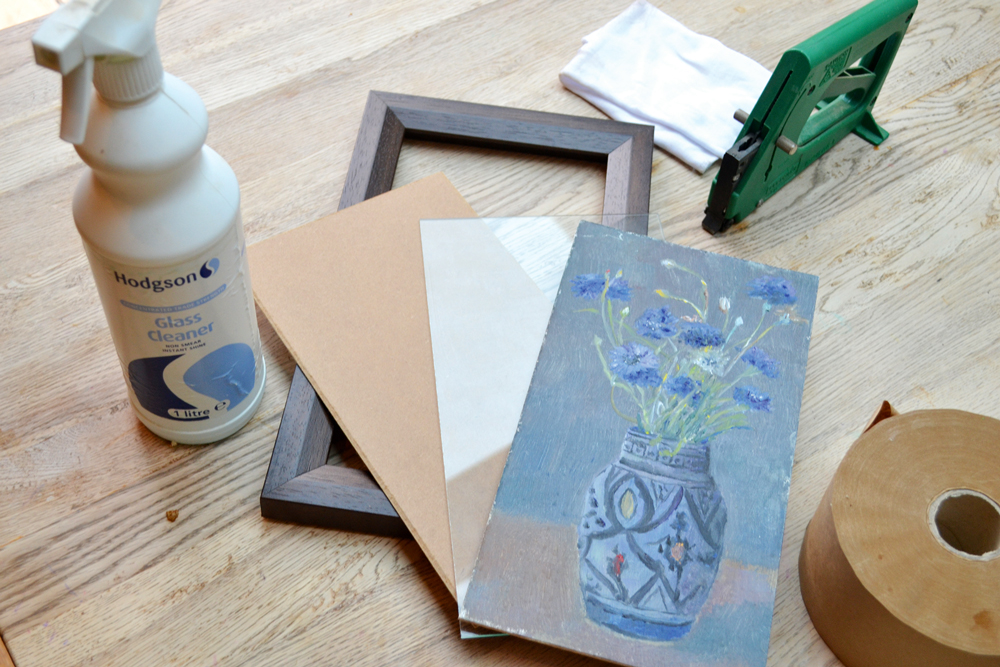
Make clean everything, and then make clean it again. Vacuum upwards all the dust, polish the frame and clear away surplus tools and equipment. Remove the ring clamp and identify the frame face up-downwardly on your clean, flat surface, then run around the rebate with the vacuum to remove whatsoever grit or debris.
Next, make clean the glass on both sides using a quality cleaning amanuensis to forbid any smears, leaving a crystal articulate stop. Lay the glass into the frame, treatment it every bit picayune every bit possible. Again, run the vacuum around the inside of the frame to clear whatsoever debris. Side by side, lay the art on the glass and finally put the backing board in place.
13. Add finishing touches
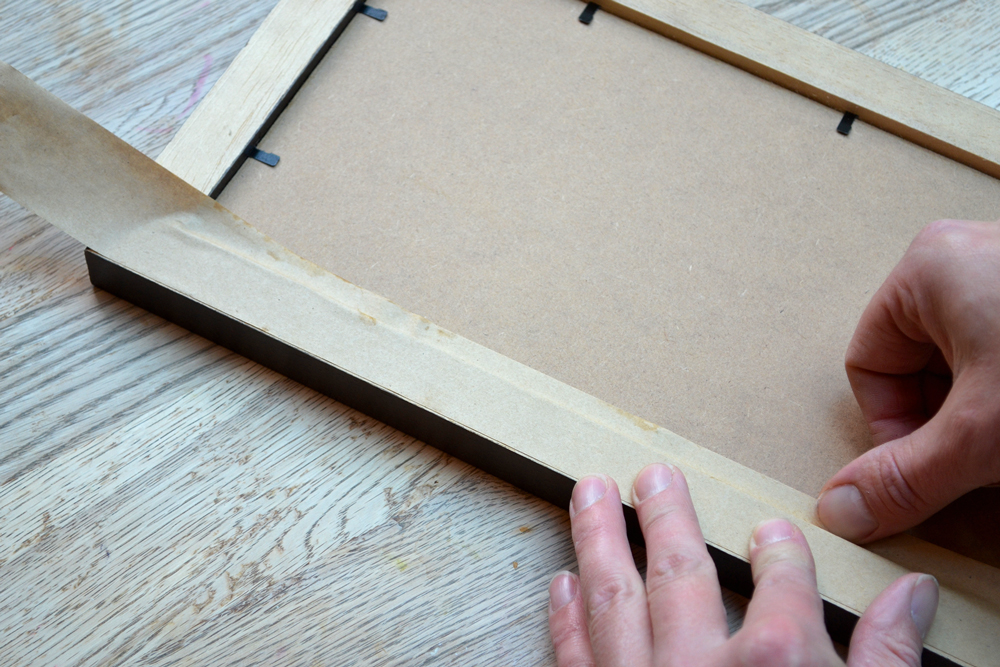
Pin the backing board tight into the frame with some framer's points or console pins. Carefully insert these with a pin hammer or a specialist framer's signal gun. Or you could use a PushMaster, which has a handy groove for inserting points by hand. Give everything a wipe down and so run a length of gummed tape around the frame and backing board, cutting it into the corners with a sharp bract to seal the dorsum of the frame.
Finally, position a couple of cord hangers on the frame edges and run a length of picture cord between them. Knot these securely and your frame is set to hang.
Related articles:
- Art techniques: Tutorials for painting and drawing
- Best watercolour paints: Height watercolours for artists
- How to mountain your artwork: Acquire how to mount your work
Related articles
Source: https://www.creativebloq.com/features/how-to-frame-your-own-art
0 Response to "Where Can I Add My Own Art to My Things"
Post a Comment